

To migrate a WordPress site to a new host without downtime, you must keep your old site live while building the new one, lower your DNS Time to Live (TTL) to 300 seconds 24 hours in advance, and test the new server using a local hosts file before changing your domain’s nameservers. This guide walks you through both plugin and manual migration methods, how to manage DNS propagation, and the exact post-migration checks for SSL and email.
Should You Use a Plugin or Manual Migration?
Choosing the right method depends on your site’s size and your comfort level with server tools. WP Engine notes that “using a dedicated migration plugin automates complex backend work” and protects your site against data loss and broken links. For most small to medium blogs and business sites, a plugin is the fastest and safest route.
However, WP Engine also warns that “large websites can be more prone to errors when using migration plugins”, such as timing out during the export process. If your site has thousands of posts, massive media libraries, or complex multisite networks, manual migration via FTP and phpMyAdmin gives you complete control and prevents plugin-related failures.
| Feature | Plugin Migration | Manual Migration (FTP/DB) |
|---|---|---|
| Best For | Beginners, small to medium sites | Advanced users, massive sites, multisite |
| Speed | Fast (automated packaging) | Slower (manual file and DB transfers) |
| Technical Skill | Low (click-through interface) | High (requires FTP and database knowledge) |
| Risk of Timeout | Higher on large sites | Lower (you control the file chunks) |
How to Prepare Your Site and Lower DNS TTL
Blogs Wizards
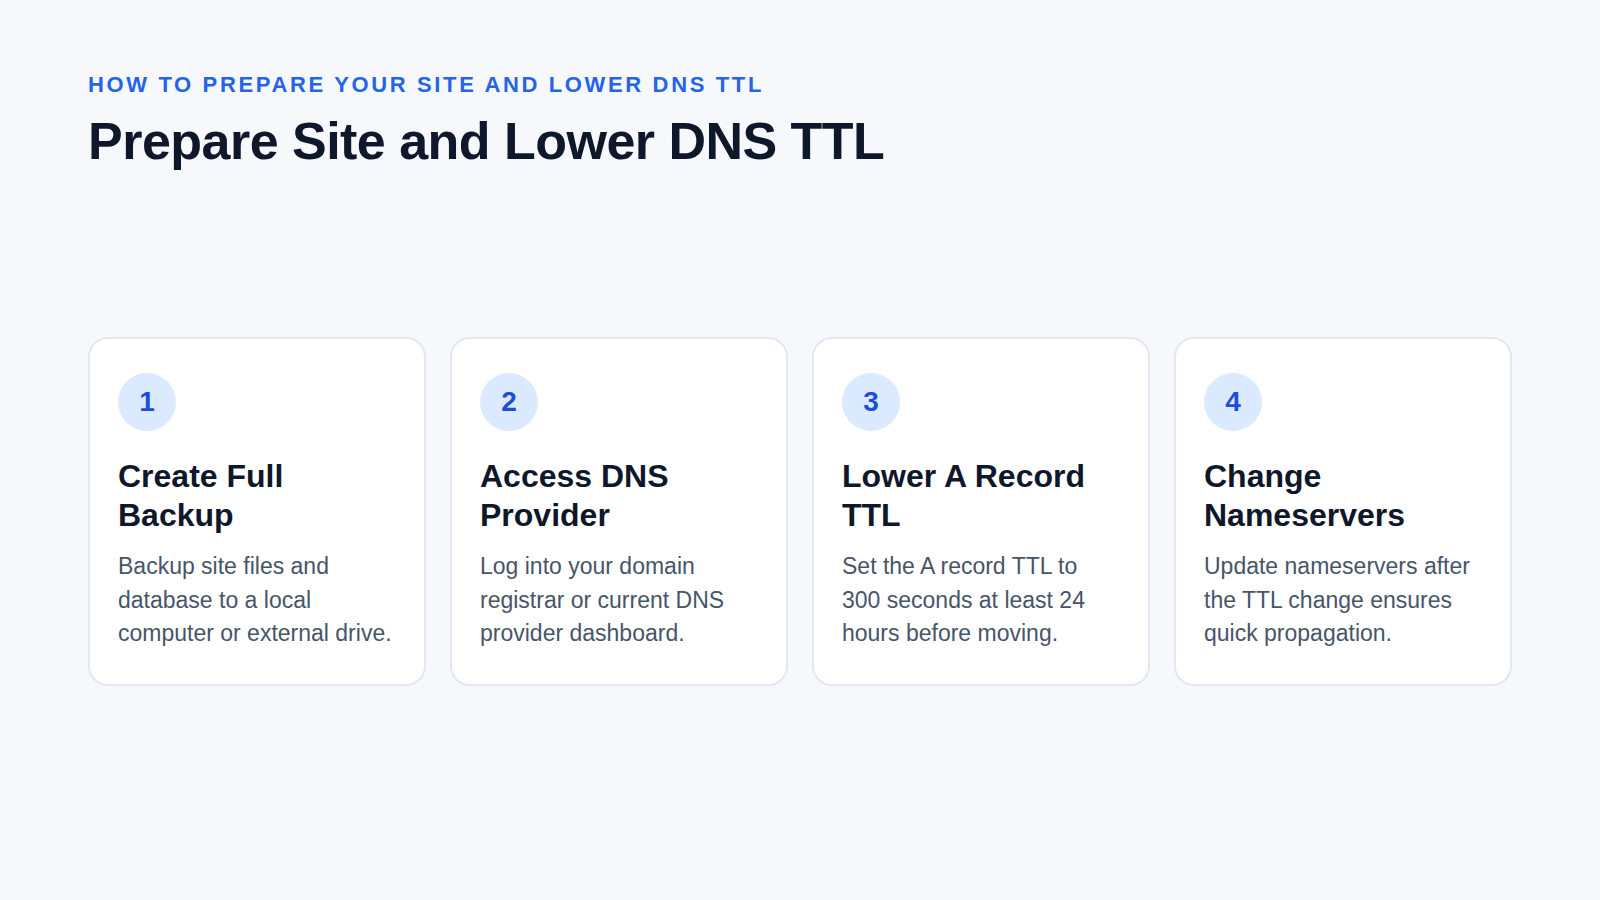
Before you move a single file, you need to prepare your current environment to ensure a smooth handoff. HostSailor emphasizes that you must “always make a full backup of your site’s files and database first”. Store this backup locally on your computer or an external drive, not just on the server.
The most critical step for avoiding downtime happens before the move: adjusting your DNS Time to Live (TTL). InMotion Hosting clarifies that "DNS propagation is the time it takes for changes to your domain’s DNS records to spread across the internet", which can take up to 24 hours if your TTL is set to 24 hours (86,400 seconds).
To prevent visitors from being sent to a dead server during the switch, log into your domain registrar or current DNS provider and lower the TTL for your A record to 300 seconds (5 minutes). Do this at least 24 hours before you plan to change your nameservers. This tells global DNS resolvers to refresh your IP address frequently, ensuring the final switch happens in minutes rather than hours.
Step-by-Step Guide to Migrating via a Plugin
If your site is under 500MB and you prefer a visual interface, a migration plugin is the way to go. The official Learn WordPress platform demonstrates using All-in-One WordPress Migration for straightforward, beginner-friendly transfers. Duplicator is another excellent alternative that packages your files and database into a single installer.
- Install the plugin on your old site: Go to Plugins → Add New, search for your chosen migration plugin, and activate it.
- Export your site: Open the plugin’s menu in your left sidebar and select Export. Choose the "File" or "Package" option to generate a downloadable archive of your entire site. Save this file to your computer.
- Set up WordPress on the new host: Log into your new hosting control panel (like cPanel or a custom dashboard) and use the one-click installer to set up a fresh, blank WordPress instance. Note the temporary URL or IP address provided by your new host.
- Install the plugin on the new site: Log into the new WordPress dashboard, install the exact same migration plugin, and activate it.
- Import your site: Open the plugin menu, select Import, and upload the archive file you downloaded in step 2. The plugin will overwrite the blank database and files with your live site’s data.
Step-by-Step Guide to Manual Migration via FTP
Blogs Wizards
For large sites or when plugins fail, manual migration is the most reliable method. FastComet provides a detailed guide on manual WordPress migration without plugins using FTP and database tools.
- Export your database: Log into your old host’s phpMyAdmin. Select your WordPress database, click the Export tab, choose the "Quick" method, and save the
.sqlfile to your computer. - Download your files: Connect to your old server using an FTP client like FileZilla. Download the entire
public_html(orwww) directory to your local machine. - Create a new database: In your new host’s control panel, create a new MySQL database, a database user, and a password. Note these credentials.
- Upload your files: Connect to your new server via FTP and upload all your WordPress files into the
public_htmldirectory. - Import your database: Open phpMyAdmin on your new host, select the new empty database, click Import, and upload the
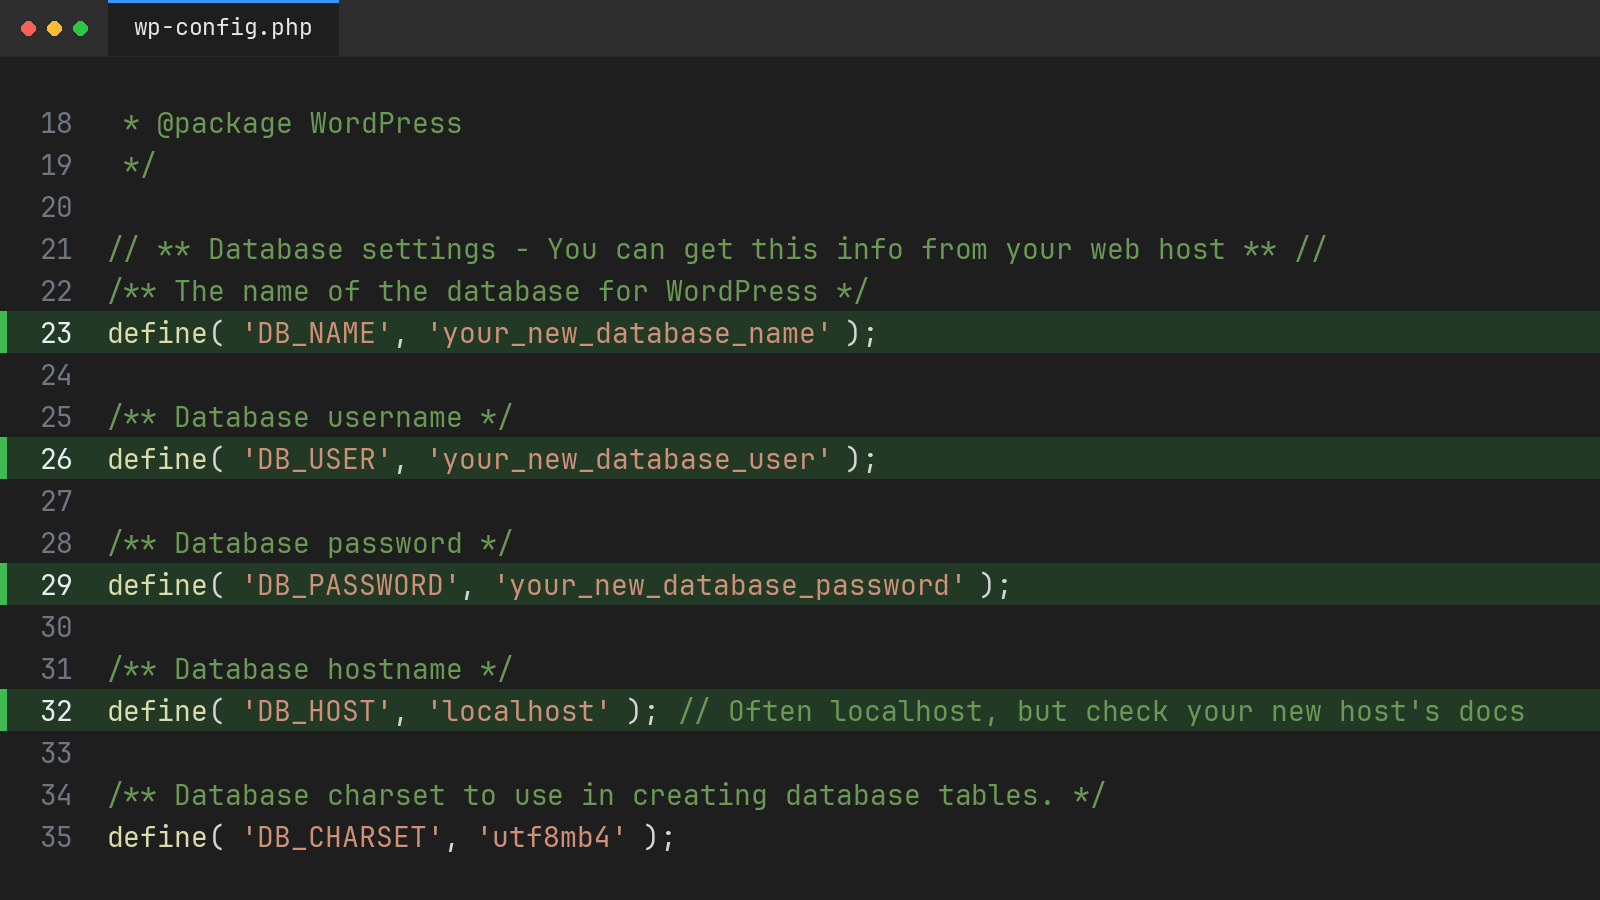
.sqlfile you saved earlier. - Update your configuration file: You must tell WordPress how to connect to the new database. Edit the
wp-config.phpfile in your new server’s root directory and update the database credentials:
define( 'DB_NAME', 'your_new_database_name' );
define( 'DB_USER', 'your_new_database_user' );
define( 'DB_PASSWORD', 'your_new_database_password' );
define( 'DB_HOST', 'localhost' ); // Often localhost, but check your new host's docs
If your domain name is also changing, the official WordPress Developer Handbook advises that you may need to manually change the Site URL in wp-config.php by adding define( 'WP_HOME', 'https://yournewdomain.com' ); and define( 'WP_SITEURL', 'https://yournewdomain.com' ); to ensure the admin area loads correctly.
How to Test the New Host Before Switching DNS
Blogs Wizards
OnlineOrNot emphasizes that the first step is to transfer your content to your new host, without turning off the old host. You need both environments running simultaneously to verify the move was successful before the public sees it.
To test the new site using your actual domain name, you must edit your computer’s local hosts file. This forces your specific computer to bypass global DNS and look directly at the new server’s IP address.
- On Windows: Open Notepad as an Administrator and open
C:WindowsSystem32driversetchosts. - On Mac: Open Terminal and type
sudo nano /etc/hosts.
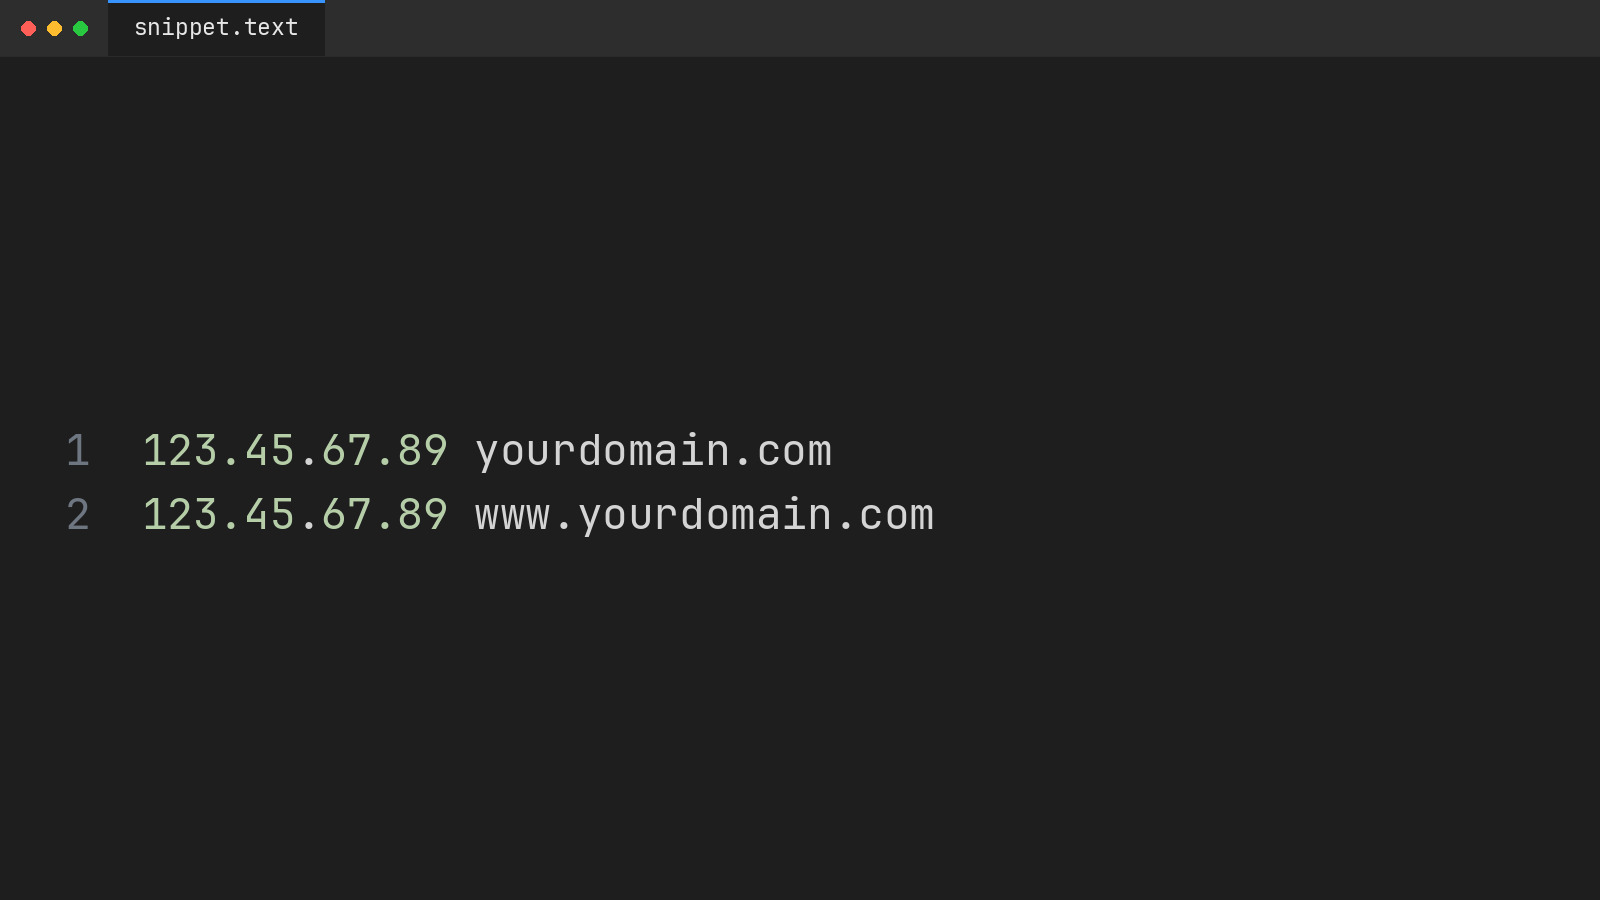
Add a new line at the bottom with your new server’s IP address followed by your domain name:
123.45.67.89 yourdomain.com
123.45.67.89 www.yourdomain.com
Save the file and clear your browser cache. Now, when you visit your domain, you are viewing the new host’s version of the site. Click through your pages, check that images load, test your contact forms, and ensure your theme displays correctly.
Maintaining this overlap is the core secret to zero downtime. HostAccent points out that "The gap, when it happens, lands during the cutover — the moment your domain stops pointing at the old server and starts pointing at the new one". By keeping the old site live until the final DNS switch, you ensure that any visitor whose ISP hasn’t updated its DNS cache yet still lands on a fully functioning website.
What to Check After the DNS Switch (SSL, Email, and SEO)
Once you are confident the new site works perfectly via your hosts file, it is time to point your domain to the new host. Log into your domain registrar and update your nameservers or A record to the new host’s IP. Remove the custom entries from your local hosts file so you can see the live, public version of the site.
After the switch, verify three critical elements:
- Email Deliverability: Many site owners panic when emails stop working after a host move. Kinsta dispels the fear that changing DNS disrupts email delivery, explaining that "MX records direct email delivery and exist separately from A records that point your domain to web hosting". If your email is hosted separately (like Google Workspace or Microsoft 365), your MX records remain untouched. If your email was hosted on the old web server, you must recreate the email accounts and migrate the mail files on the new host.
- SSL Certificates: SSL certificates are issued for your domain name, not an IP address (Let’s Encrypt checks that you control the domain before issuing one), but the certificate installed on your old host does not move with your files. Use your new host’s control panel to issue and install a new Let’s Encrypt or paid SSL certificate for your domain. Force HTTPS in your WordPress settings under Settings → General.
- SEO and Redirects: If you changed your domain name during the migration, Learn WordPress advises that if you are concerned about SEO, it is advised to set up 301 redirects from the old URLs to the new ones to preserve your search rankings and link equity.
Frequently asked questions
Can I transfer a WordPress site to a new host?
Yes, you can transfer a WordPress site to a new host using either an automated migration plugin for smaller sites or a manual transfer via FTP and phpMyAdmin for larger, more complex sites. The key is to keep the old site active while you build and test the new one.
How do I manually migrate my WordPress site?
To manually migrate your site, download all WordPress files via an FTP client and export your database as an .sql file via phpMyAdmin. Upload the files to the new server, import the database into a new MySQL environment, and update the database credentials in your wp-config.php file.
How do I migrate a website from one host to another without downtime?
To avoid downtime, lower your DNS TTL to 300 seconds 24 hours before the move, copy your files and database to the new server, and test the new site by editing your computer’s local hosts file. Only update your domain’s public DNS records after you have verified the new site is working perfectly.
Reviewed by Shahid Anwer · Editorial standards
